Platform Overview
Fuzzing Terminology
Install the Fuzzbuzz CLI
Find your first C/C++ bug
Find your first Python bug
Find your first Rust bug
Find your first Go bug
Protocol Fuzzing
Seeding your fuzzer
Integrating with libFuzzer
Heartbleed in 5 Minutes
GitHub Integration
GitLab Integration
CLI Integration
fuzzbuzz.yaml reference
Fuzzer Reference
Bug Types
Self-Hosted Fuzzbuzz
Overview
Getting Started
Guides
Tutorials
Integrations
Reference
Seeding your fuzzer
Seeding a fuzz test is the act of providing the fuzzer with example inputs that cover specifc lines of code, or trigger interesting functionality. If you notice that your fuzzer is not covering a specific area of your code that you would like to test, adding a new seed that covers the desired code can unblock the fuzzer, enabling it to progress deeper into the code. Fuzzbuzz manages your corpus of interesting inputs automatically, but it can be useful to augment your fuzz tests with extra seeds for more complex use cases.
This page will act as a reference guide for how to seed various fuzz testing tools.
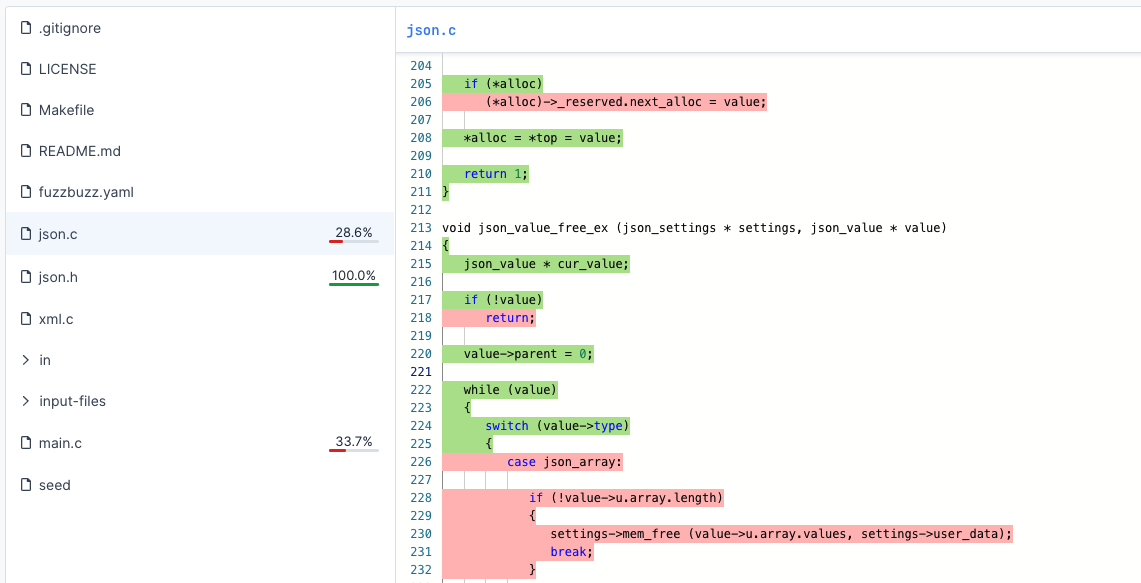
You can use the code coverage viewer on the platform to help you find untested areas of your code:

C and C++
You can seed your C or C++ fuzz tests written using Fuzzbuzz by calling the fuzzTarget::addSeed() function. Consider a fuzz target that takes a string and an integer as arguments:
// <part of a fuzz test definition>:

auto stringGen = fzbz::generator::string<std::string>();
auto intGen = fzbz::generator::integer<int32_t>();

auto target = fzbz::fuzzTarget([&](auto str, auto integer) {
    // Do something with the data
    RunMyCode(str, integer);
}, stringGen, intGen);

// <end part>:
You can add a seed to the test by simply passing inputs to addSeed in the same order they were passed to the inputs:
// <part of a fuzz test definition>:

auto stringGen = fzbz::generator::string<std::string>();
auto intGen = fzbz::generator::integer<int32_t>();

auto target = fzbz::fuzzTarget([&](auto str, auto integer) {
    // Do something with the data
    RunMyCode(str, integer);
}, stringGen, intGen);

target.addSeed("hello", 123");
// we can add as many seeds as we want
target.addSeed("world", 456);

// <end part>:
You can confirm that your seeds successfully cover new code by pushing your fuzz tests up to Fuzzbuzz and inspecting the code coverage viewer.
Go
You can seed your Go fuzz tests using the f.Add() function on the *testing.F struct. To recap, most Go fuzz tests look something like this:
func FuzzMyCode(f *testing.F) {
    // We create a function that takes a *testing.T, as well
    // as a set of optional arguments. The fuzzer will populate
    // these arguments
    f.Fuzz(func(t *testing.T, x string, y int, z float64) {
        RunMyCode(x, y, z)
        // Run assertions and checks...
    })
}
To add a seed to the above fuzz test, call f.Add() with a set of arguments in the same order as you provided in your function to f.Fuzz(). You can%hink of this as telling the fuzzer that calling your test with these arguments will produce new or interesting information. A seeded version of this fuzz test might look like:
func FuzzMyCode(f *testing.F) {
    f.Add("Hello", 123, 0.5)
    // we can add as many seeds as we want...
    f.Add("World", 456, 0.9)

    // We create a function that takes a *testing.T, as well
    // as a set of optional arguments. The fuzzer will populate
    // these arguments
    f.Fuzz(func(t *testing.T, x string, y int, z float64) {
        RunMyCode(x, y, z)
        // Run assertions and checks...
    })
}
You can confirm that your seeds successfully cover new code by pushing your fuzz tests up to Fuzzbuzz and inspecting the code coverage viewer.
Rust
Fuzzbuzz currently supports fuzzing Rust code using cargo-fuzz. You can seed your Rust fuzz tests by adding inputs to the corpus directory relative to your fuzz folder.
For context: when you run cargo fuzz add <target-name>, cargo-fuzz will create a fuzz directory, with a corpus subdirectory. Place the input you wish to add to your corpus in a file, inside the corresponding directory for your specific fuzz test.
You can confirm that your seeds successfully cover new code by pushing your fuzz tests up to Fuzzbuzz and inspecting the code coverage viewer.