Platform Overview
Fuzzing Terminology
Install the Fuzzbuzz CLI
Find your first C/C++ bug
Find your first Python bug
Find your first Rust bug
Find your first Go bug
Protocol Fuzzing
Seeding your fuzzer
Integrating with libFuzzer
Heartbleed in 5 Minutes
GitHub Integration
GitLab Integration
CLI Integration
fuzzbuzz.yaml reference
Fuzzer Reference
Bug Types
Self-Hosted Fuzzbuzz
Overview
Getting Started
Guides
Tutorials
Integrations
Reference
Managing Generators
Generators are user-defined modules that specify the shape of data the fuzzer should generate. They exist on the team level within an organization. That is, all projects within a team have access to the same variants. Different organizations have completely independent sets of variants.
The default team on your organization will come pre-installed with Fuzzbuzz-provided generators. New teams will start with an empty set of generators.
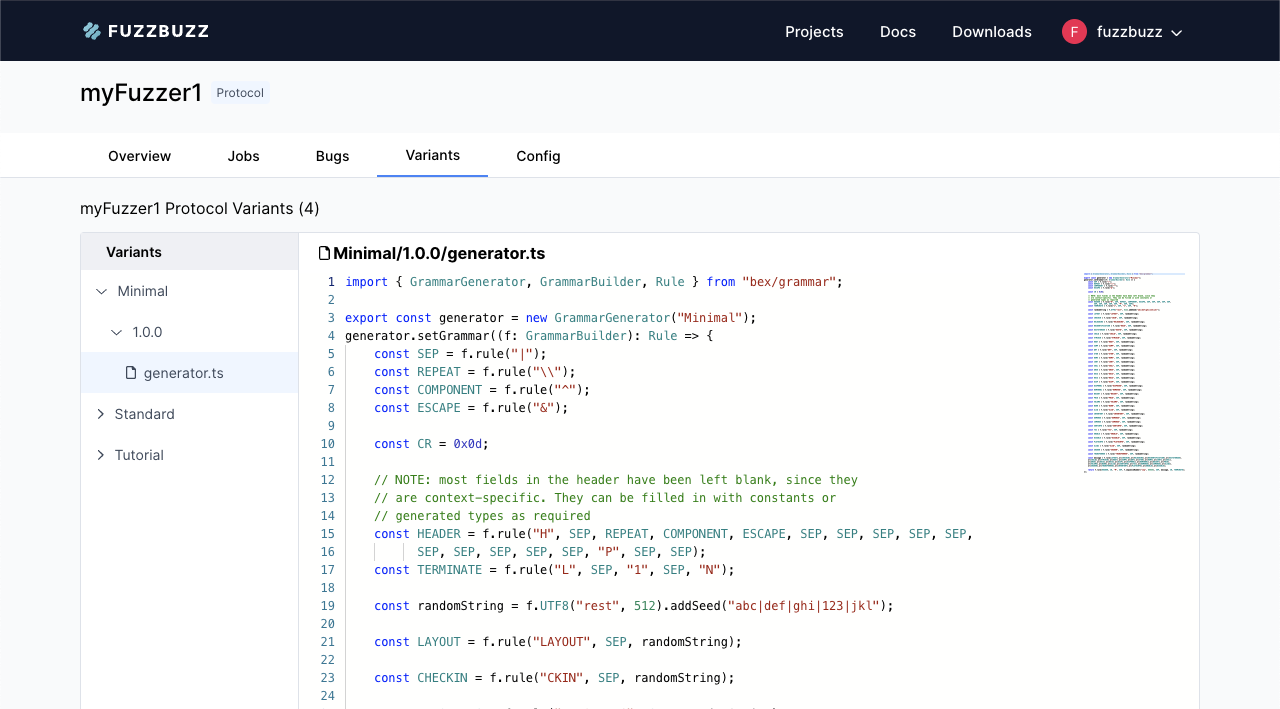
The Generator Viewer
To view the generators currently available to you, click through to the Variants tab on any protocol fuzzing project.

Building Custom Generators
You can use the Fuzzbuzz CLI to build custom generators. For immediate help, run fuzzbuzz protocol generator --help.
To create a new generator definition in the folder my_new_generator, run:
fuzzbuzz protocol generator init my_new_generator
You shuld see the following output:
Generator my_new_generator created in ./my_new_generator/generator.ts
Run: 'fuzzbuzz protocol generator example my_new_generator' to generate an example
If you look in your newly created my_new_generator folder, you will see a generator.ts file. This can be thought of as the "main" of your generator. You will notice that the Typescript file also exports a variable named generator. This variable is the entrypoint Fuzzbuzz will import to utilize your generator.
Other than these special requirements about the generator.ts file, the generator folder acts like any other Typescript project. You can create new Typescript files within the folder, and import these files from your generator.ts.
NOTE: all files used by this generator must be contained within the generator directory
For more details on the grammar development tooling available, check out the Generator Reference section.
Testing Your Grammar
To generate some examples of the types of inputs your generator will produce run:
fuzzbuzz protocol generator example my_new_generator
By default, this command will print one example of an input this generator could produce. You can generate more types of inputs using the -n flag, e.g.:
This command will generate 10 examples:
fuzzbuzz protocol generator example -n 10 my_new_generator
You can validate your grammar by running:
fuzzbuzz protocol generator validate my_new_generator
Managing Custom Generators
When you are ready to push your grammar up to the platform, run the fuzzbuzz protocol generator push command. You will need to specify a team name if your Fuzzbuzz CLI is authenticated with more than one team, e.g.:
fuzzbuzz protocol generator push --team my_team my_new_generator
Go to the Variants tab on any project within your team to view your new generator on the platform.
Variant Versioning
The first time you push a variant up to the Fuzzbuzz platform, it will be created as version 1.0.0. Every subsequent push will increment the patch version of the grammar, so 1.0.0 will become 1.0.1. This allows you to go back in time and view exactly which generator version was used in previous test runs.
You can override this version number upon push by setting the --version flag, e.g.:
fuzzbuzz protocol generator push --version "1.2.3" ...