Platform Overview
Fuzzing Terminology
Install the Fuzzbuzz CLI
Find your first C/C++ bug
Find your first Python bug
Find your first Rust bug
Find your first Go bug
Protocol Fuzzing
Seeding your fuzzer
Integrating with libFuzzer
Heartbleed in 5 Minutes
GitHub Integration
GitLab Integration
CLI Integration
fuzzbuzz.yaml reference
Fuzzer Reference
Bug Types
Self-Hosted Fuzzbuzz
Overview
Getting Started
Guides
Tutorials
Integrations
Reference
Protocol Project Setup
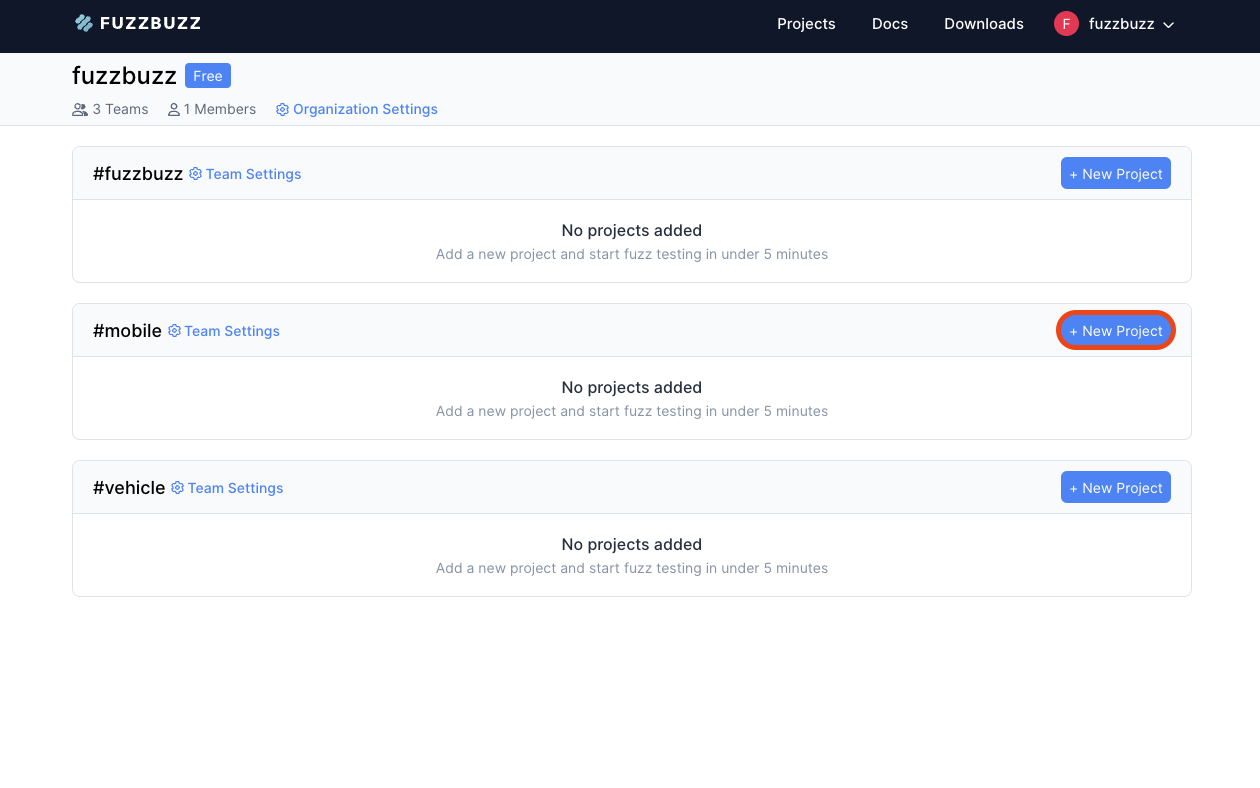
Step 1: Create a new project
To create a new protocol project, select the New Project button from your organization's homepage. Make sure you're creating your new project inside the correct team - this is denoted by the #teamName in the heading of each section.
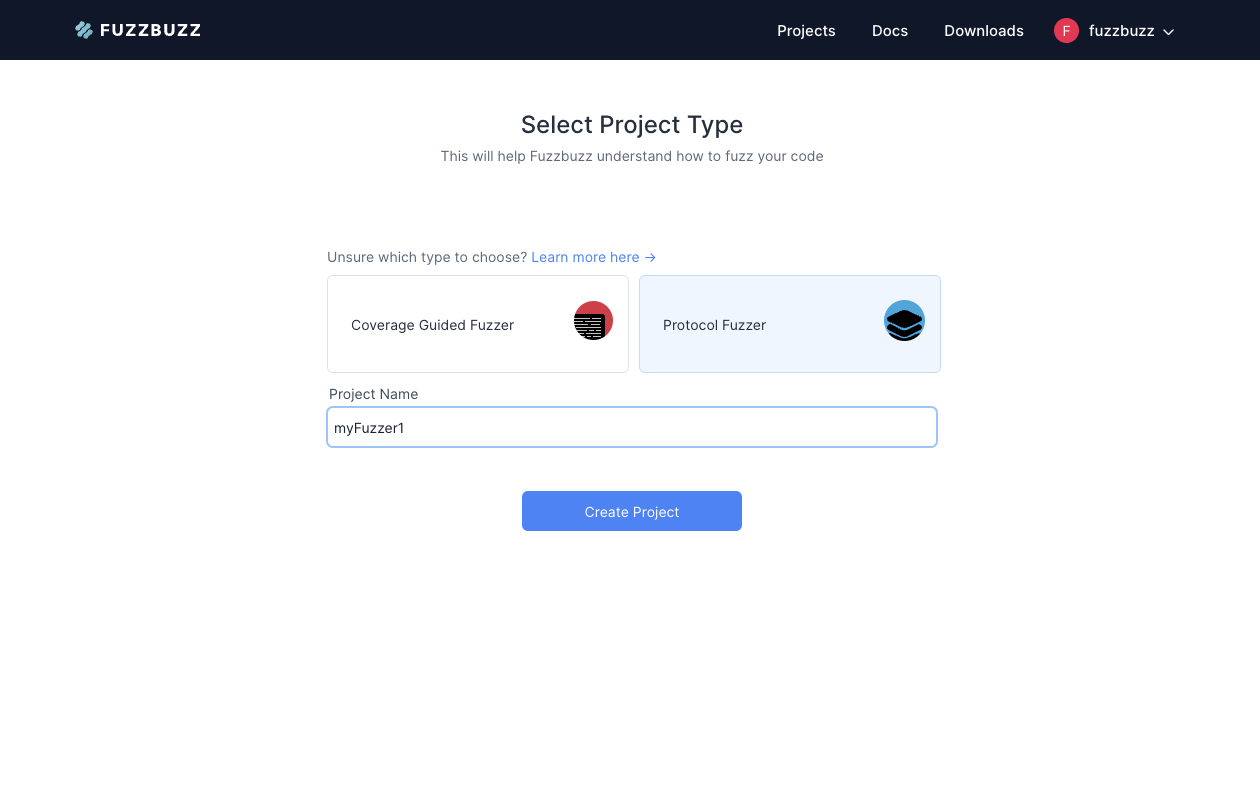
Then, select Protocol Fuzzer, enter a project name, and press the Create Project button.
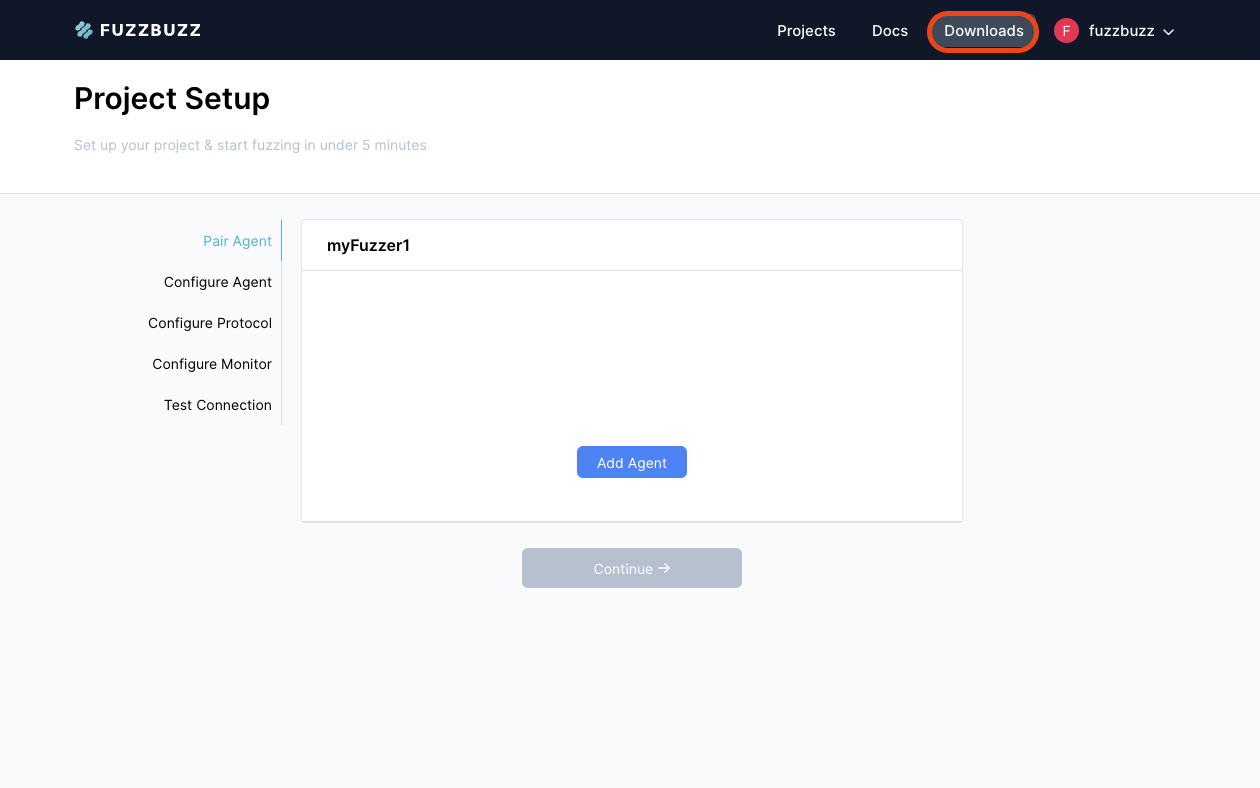
Step 2: Agent Setup
First, download the Fuzzbuzz CLI for your corresponding operating system by clicking the "Downloads" button in the header.
Select your operating system (i.e. amd64-windows for Windows), and then click the fuzzbuzz-agent.zip file to download it to your machine. Note that you should download this CLI to the machine you would like to run your tests from, which is not necessarily your personal machine. The computer you download this CLI to should be able to access the software you wish to test via the network.
Once you have unpacked the Fuzzbuzz CLI, you can run the CLI by executing the fuzzbuzz-agent/bin/fuzzbuzz binary from inside your terminal. (you may need to add .exe to the end of this command on Windows). On Windows, both Powershell and Command Prompt are supported. Note that you will need to run these terminals with Administrator Privileges if you wish to fuzz e.g. Windows Services.
Step 3: Agent Connection
Back on the Fuzzbuzz Platform, click the Add Agent button to begin pairing your agent with the platform.
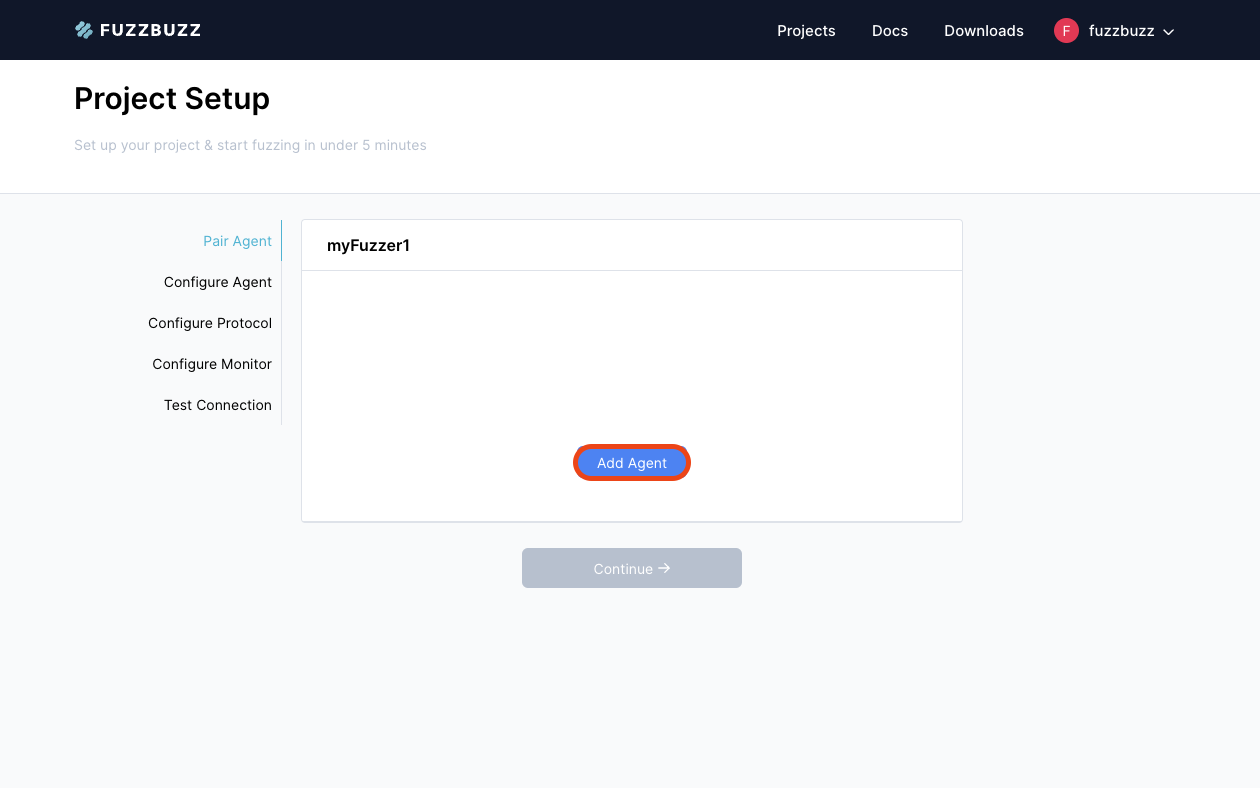
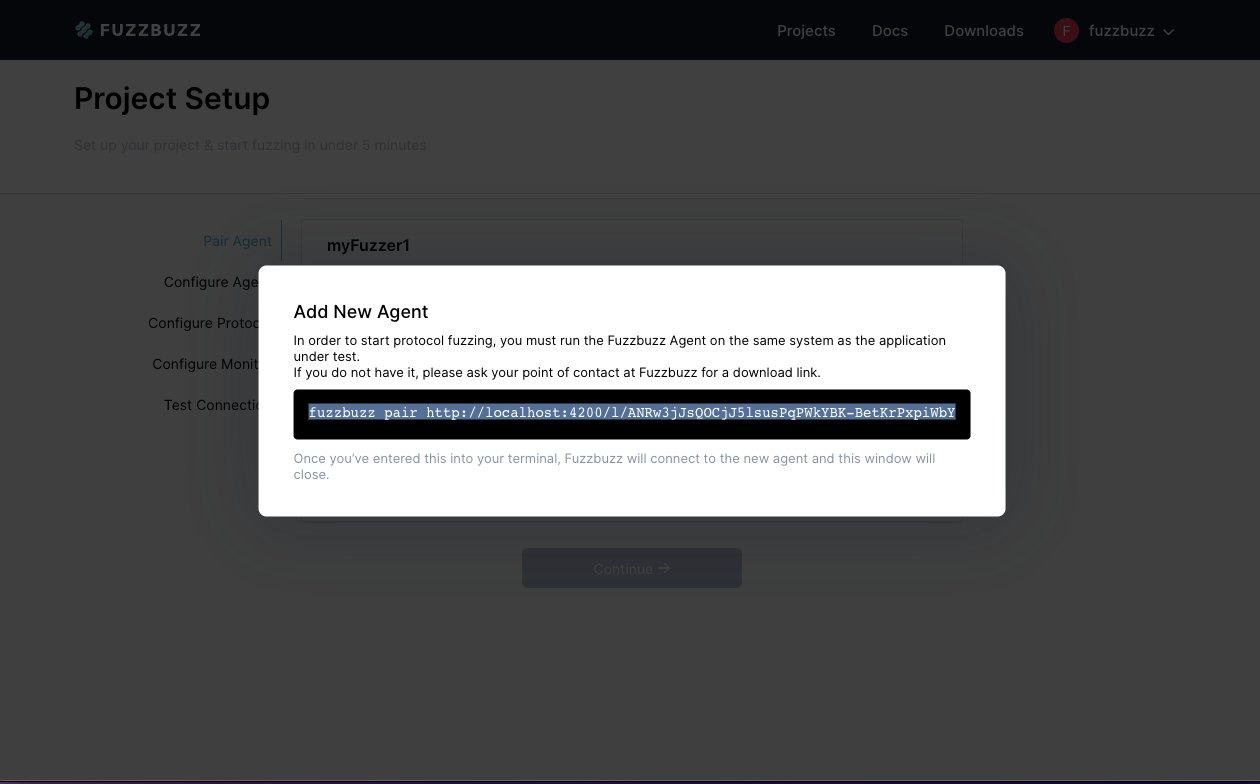
A dialog box will pop up with a pairing command. Copy this pairing command into your terminal, and run it. This only needs to be done once, whenever you wish to associate a Fuzzbuzz agent with a specific project. Note that a project can only be associated with one agent at a time, and vice versa.
Once you have successfully paired your Fuzzbuzz CLI with the platform, run:
fuzzbuzz connect
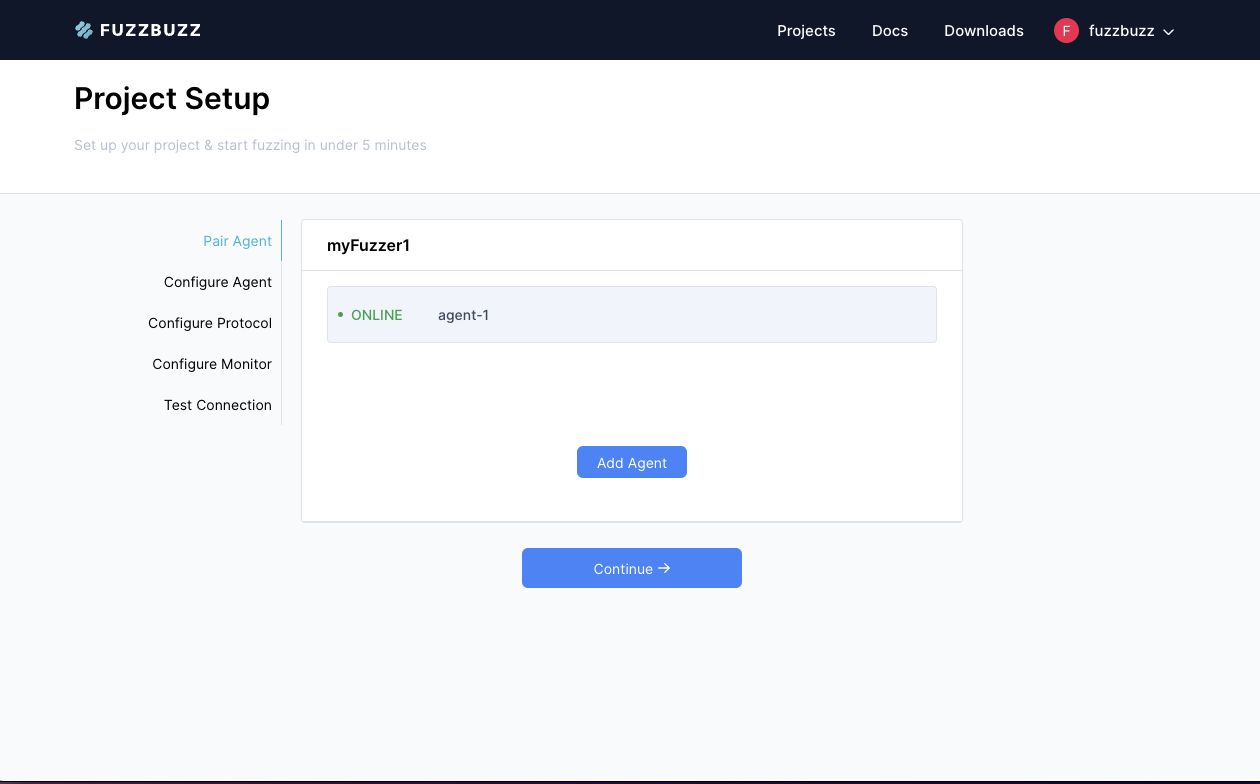
This command will continue running, and only exit when the CLI loses connection to the platform, or is manually stopped. You should see the dialog box on the platform disappear, and a new agent with a green light beside it appear in its place. If you don't see this, you may need to manually refresh the page. Select the new agent that appears, and press Continue to set up your project using this new agent.
Step 4: Target Setup
Note: all configuration options chosen in this setup flow can be changed later on.
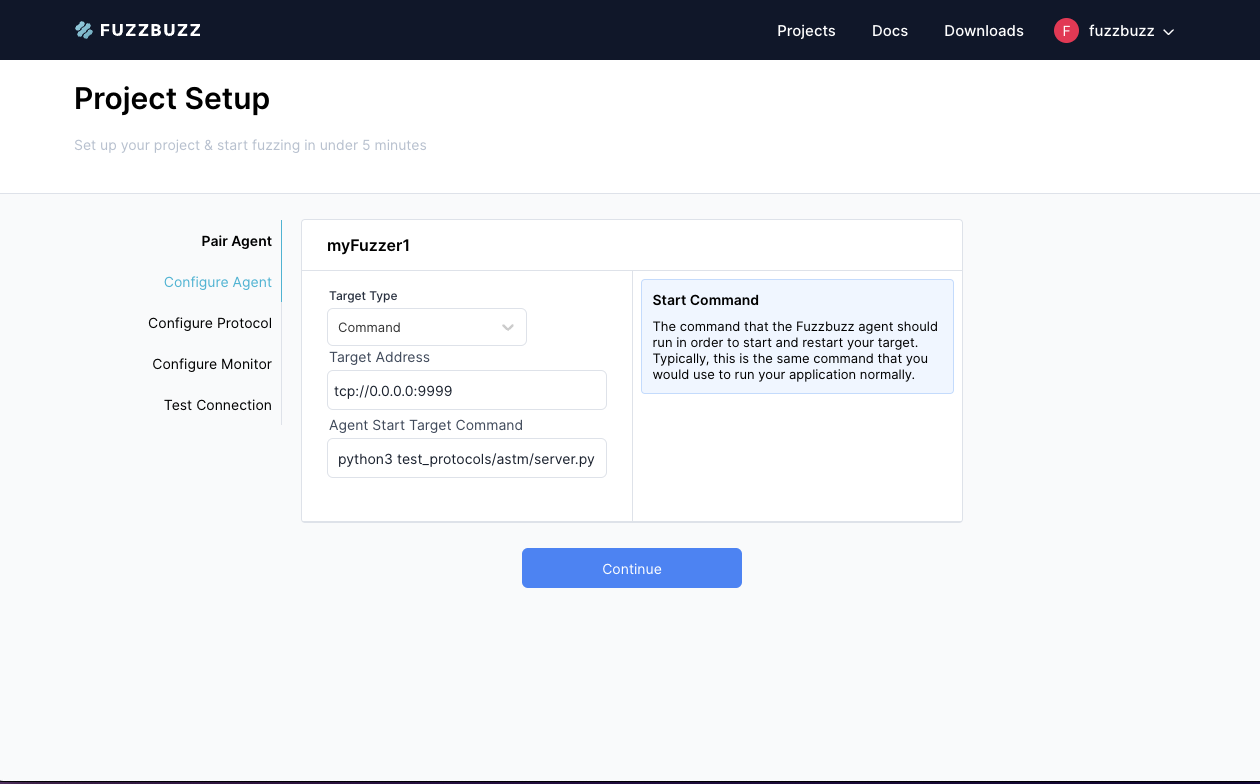
In this step, you will configure the type of application that you wish to test. There are 3 options: a Windows Service, a Command, or a Daemon.
All of these configurations share a single common field: the Target Address. This is the address of the application under test. Usually this will look something like tcp://1.2.3.4:5678. Note that the scheme, hostname, and port number must all be included. TCP is the only supported scheme at this time.
All other configurations options are dependent on the type of application under test:
Windows Service: you must provide aWindows Service Name. This is the name of the service as seen in your system configuration.Command: you must provide theStart Target Command, which will be run before the fuzzer starts testing your target. This command should be long-running, i.e. it should not exit once the target has started. For a target written in Python, this command may look something like:python target.py. On Windows, these commands are automatically run from within Powershell. On Linux, they are run within a Bash shell.Daemon: you must provide aStart Target Commandand aStop Target Command. These commands must exit promptly, and are used to start and restart the target while fuzzing. For example, if you were testing a systemd service namedmyService, the start command would besudo systemctl start myService, and the stop command would besudo sytemctl stop myService.
Fuzzbuzz automatically detects all Denial of Service style bugs by detecting when the server under test is no longer responsive. When using the Command application type, Fuzzbuzz will also detect when the command exits prematurely, and count this as a Denial of Service as well.
Select your application type, fill in the configuration, and press Continue.
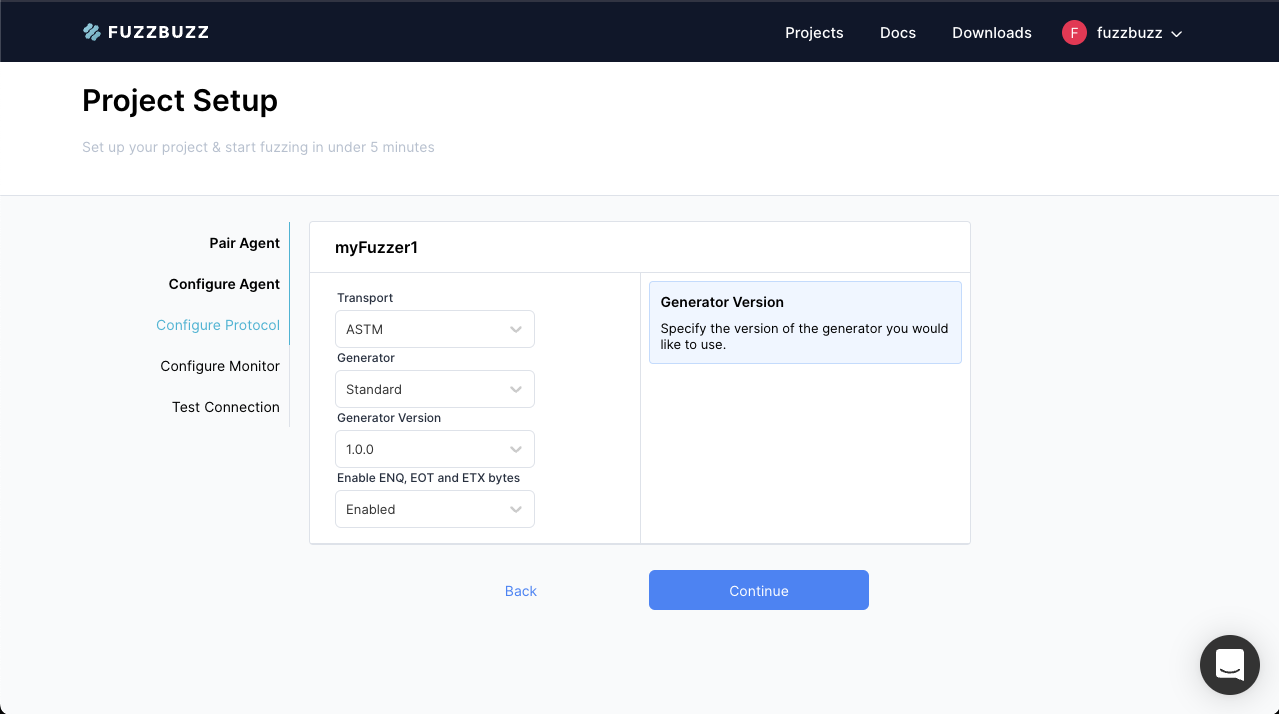
Step 5: Protocol Setup
The next step in the config process is to define the transport and protocol you wish to use. The Transport field allows you to select the low-level communication method the fuzzer should use to interact with the test target. This can be TCP, or something more complex that requires additional wire protocol implementations, like HL7. The available Transport methods depend on what your specific deployment of Fuzzbuzz has been configured with.
Once you have selected your desired transport method, choose a Generator, and a specific Version of the generator's implementation. Generators define the shape of the data that the fuzzer will produce values within. They are user-defined, but some default and sample generators are provided in your organization's default team. Check out the Managing Generators Section to learn more about how to create and use generators.
Any context-specific configuration options relevant to your chosen transport will be displayed below the version selector. Once you've configured your protocol, press Continue.
Step 6: Monitor setup
By default, the fuzzer will consider any crashes, or unexpected dropped connections to be bugs. The monitors section enables you to define other situations that the fuzzer should report as a bug.
Note: consider running the fuzzer without any monitors the first time around, to ensure everything has been configured properly. You can always tune monitors and grammars in subsequent test runs.
Fuzzbuzz comes with the following monitor types:
Timeout: specify a timeout threshold. If the test target takes longer than this threshold to respond to an input, a bug will be reported.Memory: set a maximum memory usage threshold. If the target software exceeds this threshold, a bug will be reported. Note: this monitor only works on Linux, with theCommandtarget typeFilesystem: monitor the filesystem for path traversal bugsFile Regular Expression: specify a list of comma-separated log file locations to monitor for a specific regular expression. If the regular expression appears, a bug will be reported. Useful for searching for error logs.
Press Continue to move to the next screen.
Step 7: Test Connection
This screen will show you a list of your entire configuration. If you wish to modify anything, press the Edit button to be taken back to the specific section.
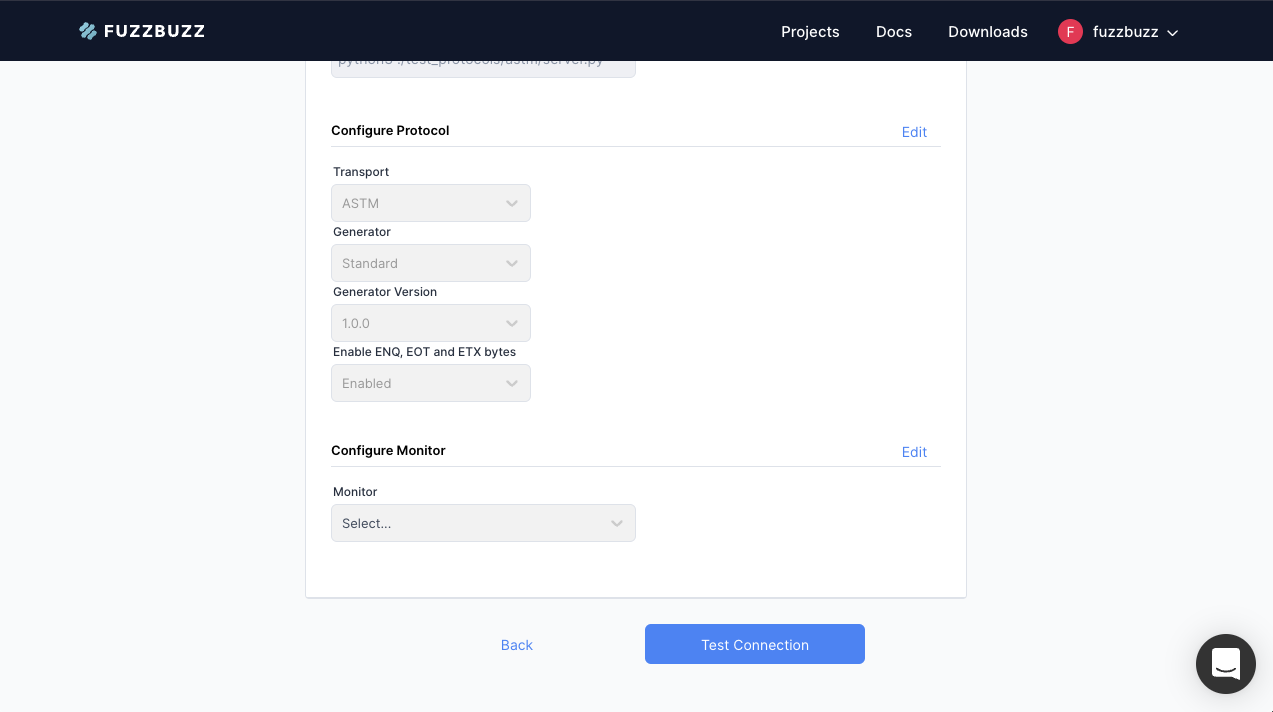
Scroll down and press Test Connection to continue. Ensure that the Fuzzbuzz CLI running fuzzbuzz connect has not exited.
You will see a live log stream from the Fuzzbuzz CLI as it attempts to connect to your target. Once it has successfully tested that the target is alive and running, the Begin Fuzzing button will become enabled. Press Begin Fuzzing to start your first fuzz run.
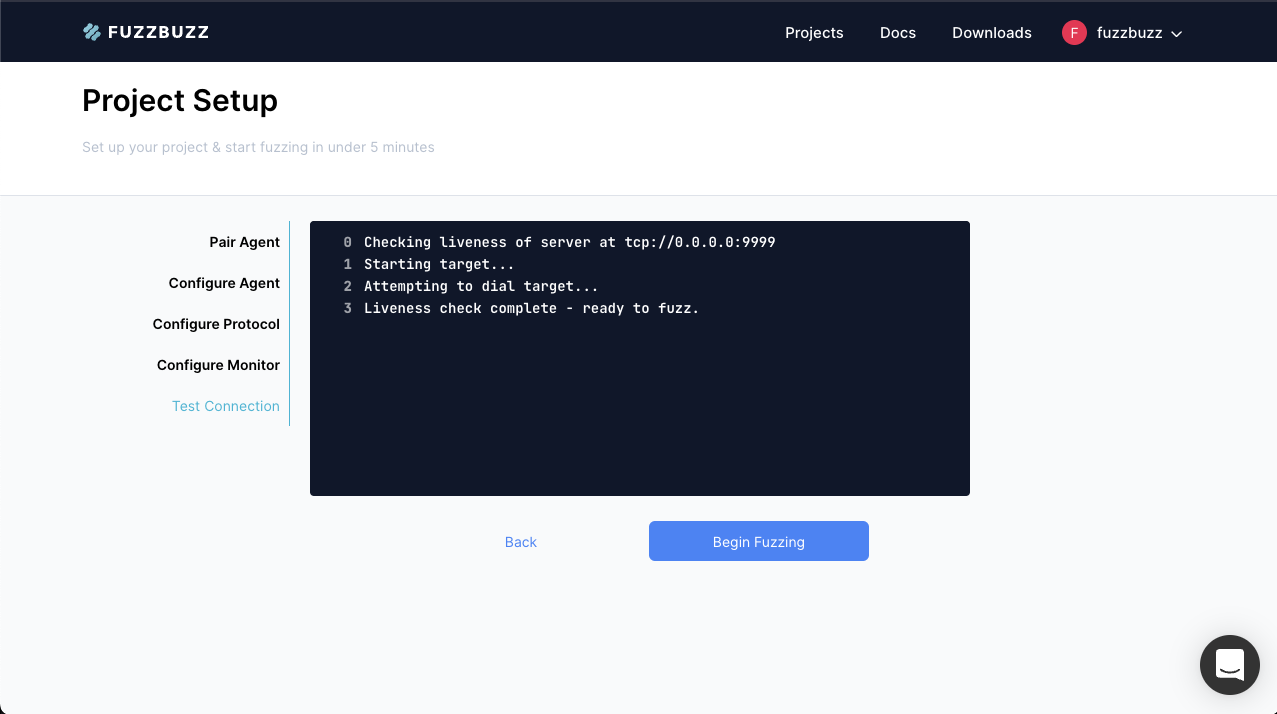
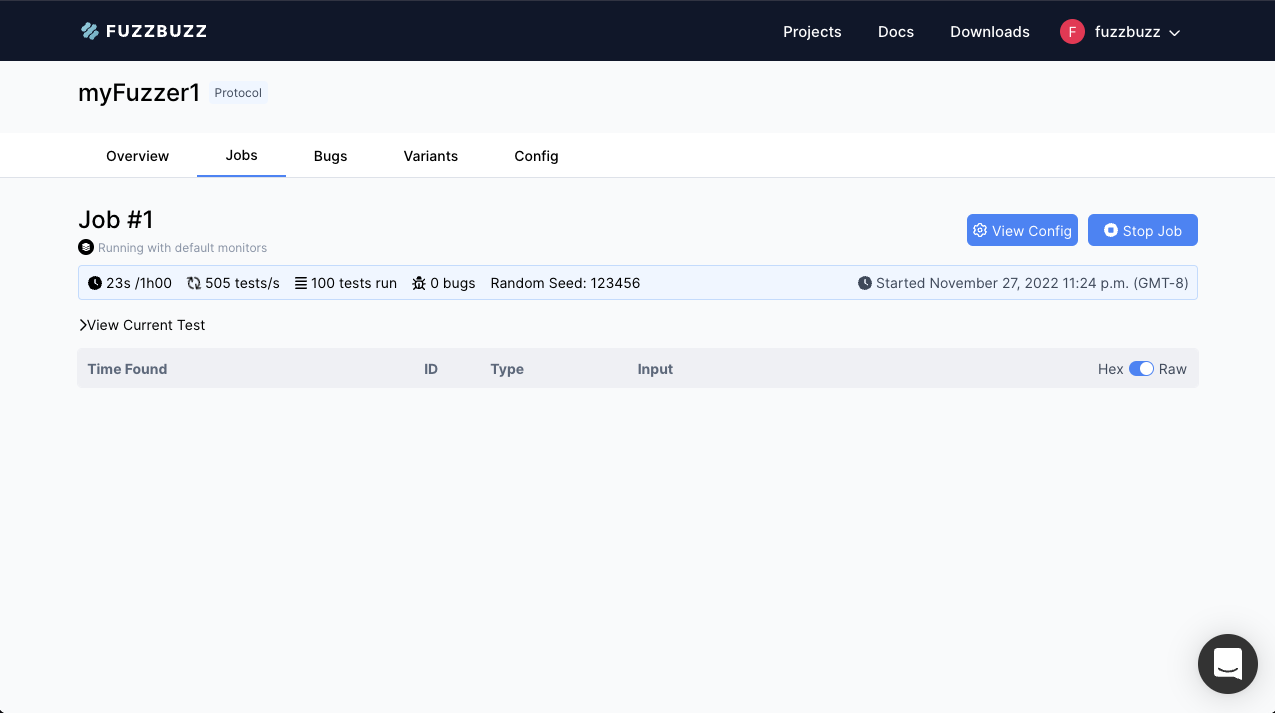
You will be presented with the Fuzz Job screen. Continue to the Fuzz Jobs section to learn more about the detailed fuzz job view.